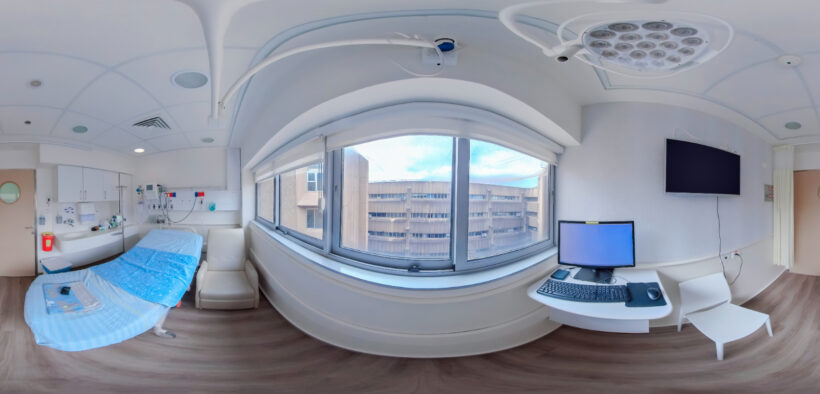
If you’ve considered using virtual reality in your course but are daunted by the tech required, there is a simple version that requires nothing more than a smartphone and free online apps. Three-hundred-sixty-degree panorama images, the kind made famous by Google Street View, can be shot on any smartphone, and when accompanied by audio, they provide a reasonable facsimile to virtual reality. Plus, multiple websites will bundle the images and audio into a story that leads the viewer through an exploration of a place.
To continue reading, you must be a Teaching Professor Subscriber.
Please log in or sign up for full access.
Love ’em or hate ’em, student evaluations of teaching (SETs) are here to stay. Parts <a href="https://www.teachingprofessor.com/free-article/its-time-to-discuss-student-evaluations-bias-with-our-students-seriously/" target="_blank"...
If you’ve considered using virtual reality in your course but are daunted by the tech required, there is a simple version that requires nothing more than a smartphone and free online apps. Three-hundred-sixty-degree panorama images, the kind made famous by Google Street View, can be shot on any smartphone, and when accompanied by audio, they provide a reasonable facsimile to virtual reality. Plus, multiple websites will bundle the images and audio into a story that leads the viewer through an exploration of a place.
The result is that instructors have started giving students 360-degree tour projects that illustrate what they have learned by teaching others. Students can use their smartphones and a website to demonstrate how principles from a class apply to their environment. Creating these multimedia tours requires students to think from the viewer’s perspective by choosing what is relevant and communicating that in a way that is engaging and easy to understand. Here is an overview of how to create these tours for course content and student assignments in your classes.
Creating a 360-degree tour
There are three basic steps to creating a 360-degree tour:
Shoot the images with a smartphone.
Record audio narration.
Upload both images and narration to a hosting site.
Shooting 360-degree images
Any smartphone can shoot a 360-degree image, though the app used will depend on the phone and operating system. All apps work in essentially the same way: the user starts the shoot and then rotates around their location as directed by the app through arrows or buttons that appear in the viewfinder to take a series of still photos that the app stitches together into a single panorama. Nearly all smartphones built in the past five years include a panorama mode as part of the camera. There are also apps available in both the Play Store and App Store. Panorama 360 is a popular option. Note that many smartphones and apps have both a Panorama and 360 Panorama mode for their camera. The 360 Panorama mode is the one you want to use as it shoots in the 2:1 aspect ratio needed for the image. The other mode shoots a wider image, which will cause the photos to be unnaturally compressed when viewed on the hosting platform.
Recording narration
Students can be assigned to shoot either one panorama with multiple narrations attached to it as hotspots or multiple panoramas each with a single accompanying narration. This is a good opportunity to guide students in developing their use of vocal inflection, pacing, and word choice to draw the listener in—an increasingly useful but rarely taught skill. Most people sound robotic when first recording their voice, so instructors should give students feedback on how to improve their narration in both content and tone and require them to rerecord to see the improvements. A good resource for teaching narration is the NPR guide “How Audio Stories Begin.” I also direct students to a sample NPR podcast to show how to create interest through wording and tone.
As for the technology, Audacity is an excellent free program for recording and editing audio, though it does require a little training on audio editing. A simpler way to record audio that you do not plan to edit is with Vocaroo, a free website that allows users to record and download audio in one click. Students can use it to record short audio segments for their project; they can then save these to their computer along with their images.
Uploading to a hosting site
The last step is to upload both images and narration to a hosting site and combine them into a story. Here are some of the best hosting sites to use:
Story Spheres is a free Google product that is simple to use. The creator first uploads their 360-degree image and then rotates it on the site using their mouse until they find the spot where they want the audio narration to play. Once they upload the audio file, they can either set it to play automatically when the viewer reaches the same spot or make a hotspot that will play the audio when the viewer clicks it. The creator can also upload more audio files to the same image. If the creator wants to use a number of images in a story, they make each one and link them to one another. The site has a 15 MB total file limit (image plus audio) for each sphere (image) but no limit on the number of spheres on an account. Here's a tutorial on how to create tours in Story Spheres:
Momento360 also makes it easy to upload and share 360 tours. It links images more clearly than Story Spheres by showing them as thumbnails on a slider, making it easier to navigate through a collection. It also allows creators to import images, documents, and audio as hotspots. Its free account provides 750 MB of total storage space—more than enough for any one project.
Expeditions Pro is an upgraded version of the older Google Expeditions app. It allows teachers to guide students in a class through Google-created virtual reality tours that students view on their own smartphones. Expeditions Pro also allows students and teachers to make your own tours, which can be viewed either on a smartphone using the app or on the website. It is completely free and allows for text and audio hotspots.
Tour it is a free learning management system (LMS) plug-in that allows instructors to assign students 360-degree tour assignments that they build right in the LMS. The instructor creates an assignment, then loads a placeholder 360-degree image, which can be taken from a sample that comes with the plug-in, into each student’s assignment bin. Students replace the placeholder image with their own and add text, photos, audio, and video. Students can also add more 360-degree images to their tour. The documentation says that it works on Canvas and Blackboard.
Three-hundred-sixty-degree tour projects provide a way to teach students multimedia communication skills for today’s media environment while also allowing them to exercise their creativity and ground their learning in the real world.