Fostering Student Creativity with Green Screen Videos

Credit: iStock.com/Hiraman

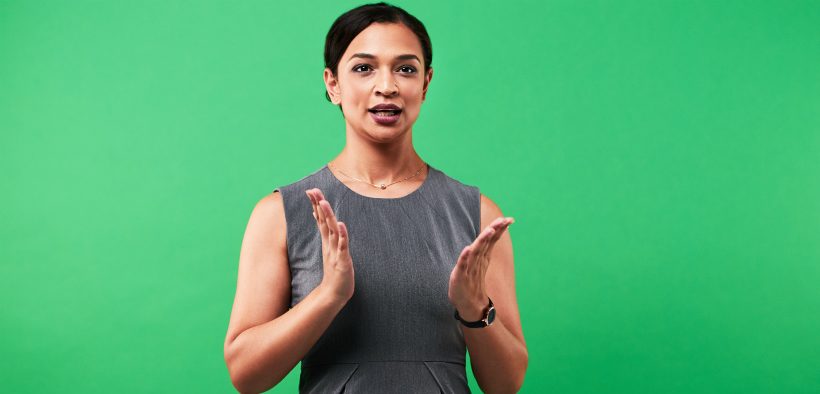
Educators have come to realize that videos are highly effective and engaging ways to create online course content. One of the most engaging forms uses a green screen backdrop to project images or videos behind or next to the speaker. Barbara Oakley used this technique in her famous course Learning How to Learn, where she brought in images to illustrate and amplify her message during course videos. Take a look at this example and consider the fact that Oakley shot the videos in her basement using only a couple hundred dollars’ worth of supplies. Today most colleges already have green screen studios set up for marketing or other uses.

Green screens also allow educators to push their students’ creativity through visual storytelling. They are easy to set up. All that is needed is a green sheet or green wall that is smooth but not reflective to light, a light kit, and a good camera and microphone. Some universities have a loaner system set up, but there are cheaper, consumer-grade alternatives that can be purchased that give professional results. It is always helpful to consult a professional with experience to assist in training on the equipment to learn how to use it effectively. My students used to go to fabric stores and buy heavier-duty green sheets or fabric to set up different shots anywhere. Then the person is filmed using a DSLR camera, action camera, tablet, or smartphone. The green background is replaced with whatever you want using chroma keying, which comes standard now in most video-editing software, such as Adobe Premiere Pro and Techsmith Camtasia. Resources such as Adobe’s Educational Exchange and Techsmith’s Academy help with trainings for software and equipment and with ideas for projects anyone can do.

Over the years, students’ creativity and insightfulness in using green screens in the classroom has been impressive. One of the first projects to use green screens was a 30-second vacation video students had to make in a communications class with students in an intermediate Spanish class. The students worked collaboratively and storyboarded, filmed, and produced travel videos from around the world and other worlds in Spanish as if they were trying to get the viewer to go there on vacation. One video highlighted the great vacation spots in Delaware, and another talked about the tourism locations on Saturn, where the students pointed out, “It is a great destination for getting engaged” (Figure 1).

Via green screen magic, two female students stand on the moon, with the Earth visible in the background. The student closet to the camera holds a piece of paper advertising free boots.

Figure 1. Students advertise a vacation on the Moon

For an American history class, students acted as reporters or documentarians covering the Revolutionary War. They interviewed soldiers and civilians about what they thought of the war and how it affected them. In a communications systems class, a group did an ESPN-style broadcast of the Roman Coliseum with pre- and post-fight analysis of gladiators as if it were a boxing match. In several classes, students used green screens or sheets and placed them over their windows in cars and sat in the parking lot recording and making it look like they were driving and having a conversation. One truly creative student hung a green screen over the outside of the classroom window and recorded the class. Every once in a while, the weather outside changed or Godzilla walked by; and during the holidays, a red-suited man said hello. One of the students’ all-time favorites is putting a green screen on a device and turning it into an X-ray machine for different body parts (Figure 2).

Image left: close up of a hand holding a smartphone over another hand. The screen is bright green. Image right: Same as image left, but green is replaced with an image of X-rayed fingers, giving impression that the smartphone is X-raying the user's hand.

Figure 2. Student using a green screen to X-ray their hand on a phone

In the college visual effects class, we had the students try to insert themselves in a movie as a background character. There were students who put themselves as background characters in Harry Potter, Star Wars, and The Wizard of Oz; it was not obvious that they were not supposed to be there. As an educator, it is exciting to record yourself in different locations and embellish your surroundings the best you can. There is nothing more exciting than talking about the human heart while sitting inside one.

The only real trick is to avoid shadows on the background, which change the shade of the color and may not be detected and replaced by the editing software. This means that lighting is crucial. Also make sure to avoid folds in the green screen, which will again cause shadows. Newer editing software has improved the process of removing different shades of color, but it is still imperative to light your subject and screen as efficiently as possible.

Digital rendering of a five-point lighting setup around a man standing before a green screen

Figure 3. Demonstration of a five-point lighting setup

The most efficient setup is a five-point lighting setup with one light on each side of the screen, casting an even light trail across it. For your subject(s), you use a key and fill light to light their front and a backlight behind the subject(s) to create a halo around them that helps to visually separate them from the green background. The goal is to use the two lights on the green screen to light it evenly and then use the other three lights to properly light your subject(s) and not cast a shadow on the background. The quicker setup is to use a three-point lighting system. Here, you light your subject as you would with a five-point system but also position the lights to cast an even light on the green screen without causing a shadow or gradient of colors behind the subjects. With the loss of the two lights on the screen itself, this setup takes practice in positioning of the lights to limit the shadows casting from the subject(s) to the screen. The positioning of this lighting system is a little closer together than the five-point system but can still create an even lighting setup that makes it easier for the editor to fix in postproduction. You can follow this tutorial to get started.

This is just a sample of the many projects that are possible using green screen videos. Once you set the stage, you will be surprised by where the students take it.

Jason Webb, MA, is a doctoral student and instructional analyst at Syracuse University. Jeff Mangram, PhD, is an associate professor in Syracuse University’s School of Education.


To sign up for weekly email updates from The Teaching Professor, visit this link.

Leave a Reply

Logged in as Julie Evener. Edit your profile. Log out? Required fields are marked *

This site uses Akismet to reduce spam. Learn how your comment data is processed.

Related Articles

Love ’em or hate ’em, student evaluations of teaching (SETs) are here to stay. Parts <a href="https://www.teachingprofessor.com/free-article/its-time-to-discuss-student-evaluations-bias-with-our-students-seriously/" target="_blank"...

Since January, I have led multiple faculty development sessions on generative AI for faculty at my university. Attitudes...
Does your class end with a bang or a whimper? Many of us spend a lot of time crafting...

Faculty have recently been bombarded with a dizzying array of apps, platforms, and other widgets that...

The rapid rise of livestream content development and consumption has been nothing short of remarkable. According to Ceci...

Feedback on performance has proven to be one of the most important influences on learning, but students consistently...

wpChatIcon