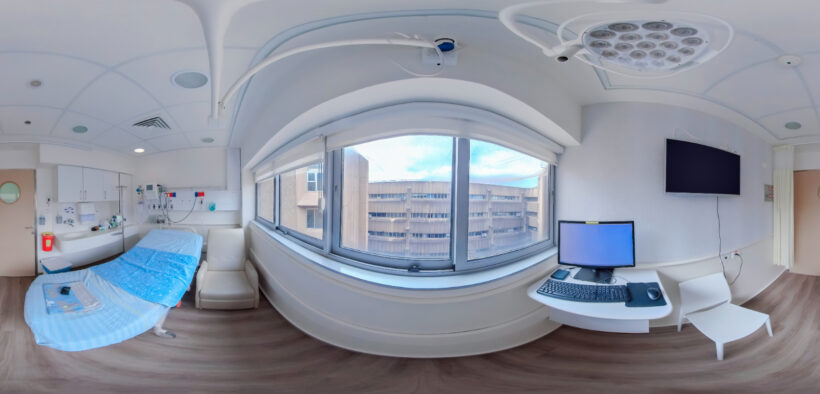
If you’ve considered using virtual reality in your course but are daunted by the tech required, there is a simple version that requires nothing more than a smartphone and free online apps. Three-hundred-sixty-degree panorama images, the kind made famous by Google Street View, can be shot on any smartphone, and when accompanied by audio, they provide a reasonable facsimile to virtual reality. Plus, multiple websites will bundle the images and audio into a story that leads the viewer through an exploration of a place.